
How to make garlic bread at home usually comes down to two things people skip, picking the right bread and controlling heat so the butter flavors the crumb without soaking it.
If you have ever pulled a tray from the oven and found the middle soft and oily, or the edges burnt while the garlic tastes sharp, you are not alone, garlic bread is simple but not forgiving when ratios and timing drift.
This guide keeps it practical, you will get a reliable base recipe, a few smart variations, and the small technique moves that make it taste like restaurant garlic bread instead of toast with garlic on top.
What makes great garlic bread (and why some turns soggy)
The best garlic bread hits three notes at once, crisp surface, soft center, and garlic that tastes nutty and aromatic rather than raw. When it misses, there is usually a clear reason.
- Bread choice: very soft sandwich bread absorbs butter fast and collapses, while a baguette, Italian loaf, or ciabatta holds structure and toasts clean.
- Butter temperature: melted butter soaks in too deeply, softened butter spreads and stays closer to the surface where browning happens.
- Garlic handling: raw minced garlic can taste harsh at high heat, lightly sautéed garlic (or garlic powder blended in) tends to read smoother.
- Heat strategy: baking to warm and crisp, then brief broil to finish, beats broiling from the start where edges burn before the center heats.
According to USDA Food Safety and Inspection Service, butter and other perishable ingredients should not sit at room temperature for more than 2 hours, so if you mix a big batch of garlic butter for a party, keep it chilled until you are ready to spread.
Quick self-check: which garlic bread situation are you in?
Before you start, pick the path that matches your kitchen reality, it saves a lot of guesswork later.
- I only have sliced sandwich bread: plan on a lower butter amount, and toast a little longer for structure.
- I have a bakery loaf (baguette/Italian): you can go heavier on garlic butter and still keep crisp edges.
- I need it fast: use garlic powder plus minced parsley, skip sautéing, finish under the broiler for color.
- I need it ahead of time: assemble, wrap, refrigerate, then bake right before serving.
- I want extra crunchy: open-face bake most of the time, then broil briefly.
If your past garlic bread tasted “flat,” that is typically a salt or acid problem, not a garlic problem, a little kosher salt and a tiny squeeze of lemon can make the butter taste brighter.
Base recipe: classic homemade garlic bread
This is the dependable version, adaptable, forgiving, and good with pasta, soup, or salads. If you are learning how to make garlic bread at home, start here before chasing fancy add-ins.
Ingredients (makes about 8–12 pieces)
- 1 loaf Italian bread or 1 baguette (about 12–16 inches)
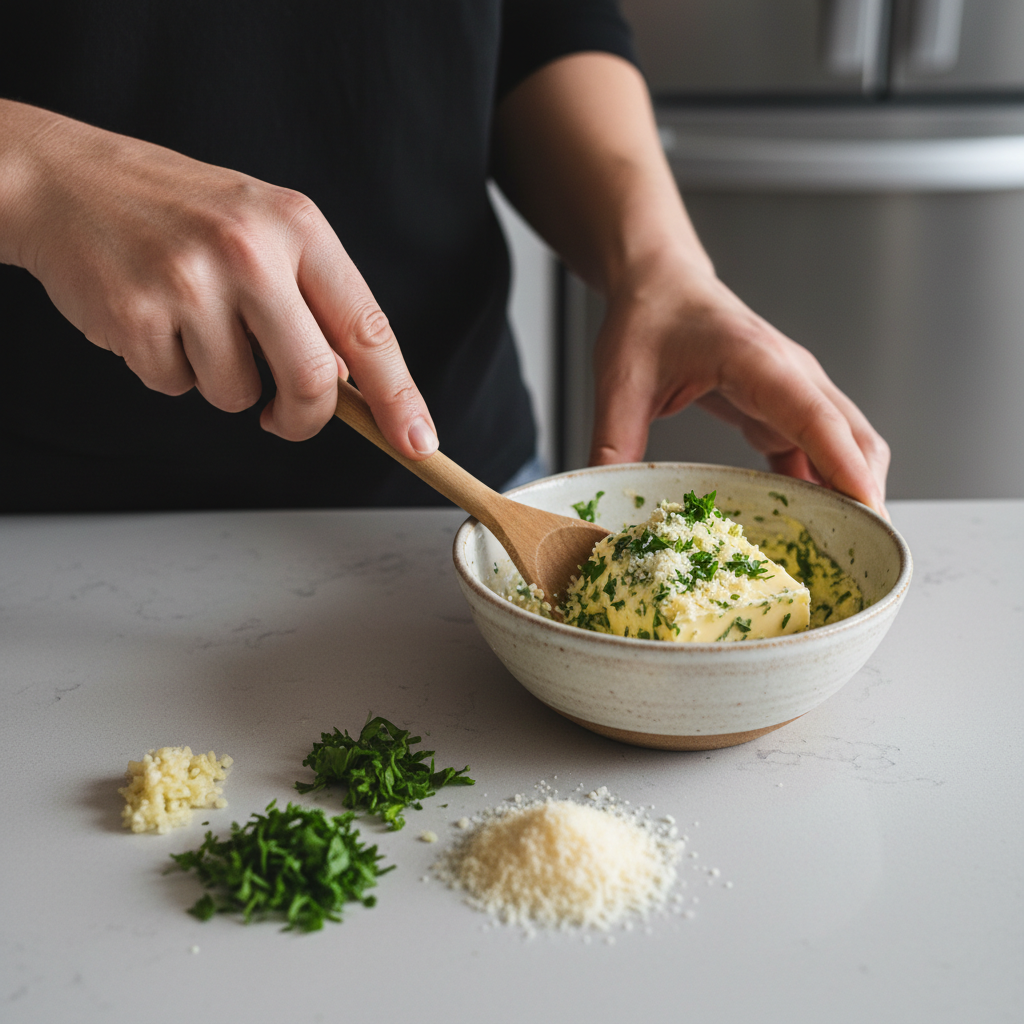
- 6 tbsp unsalted butter, softened
- 2–4 cloves garlic, finely minced (or 1 to 1 1/2 tsp garlic powder)
- 1 tbsp chopped parsley (optional but helpful)
- 1/4 tsp kosher salt, adjust to taste
- 2–4 tbsp grated Parmesan (optional)
Steps
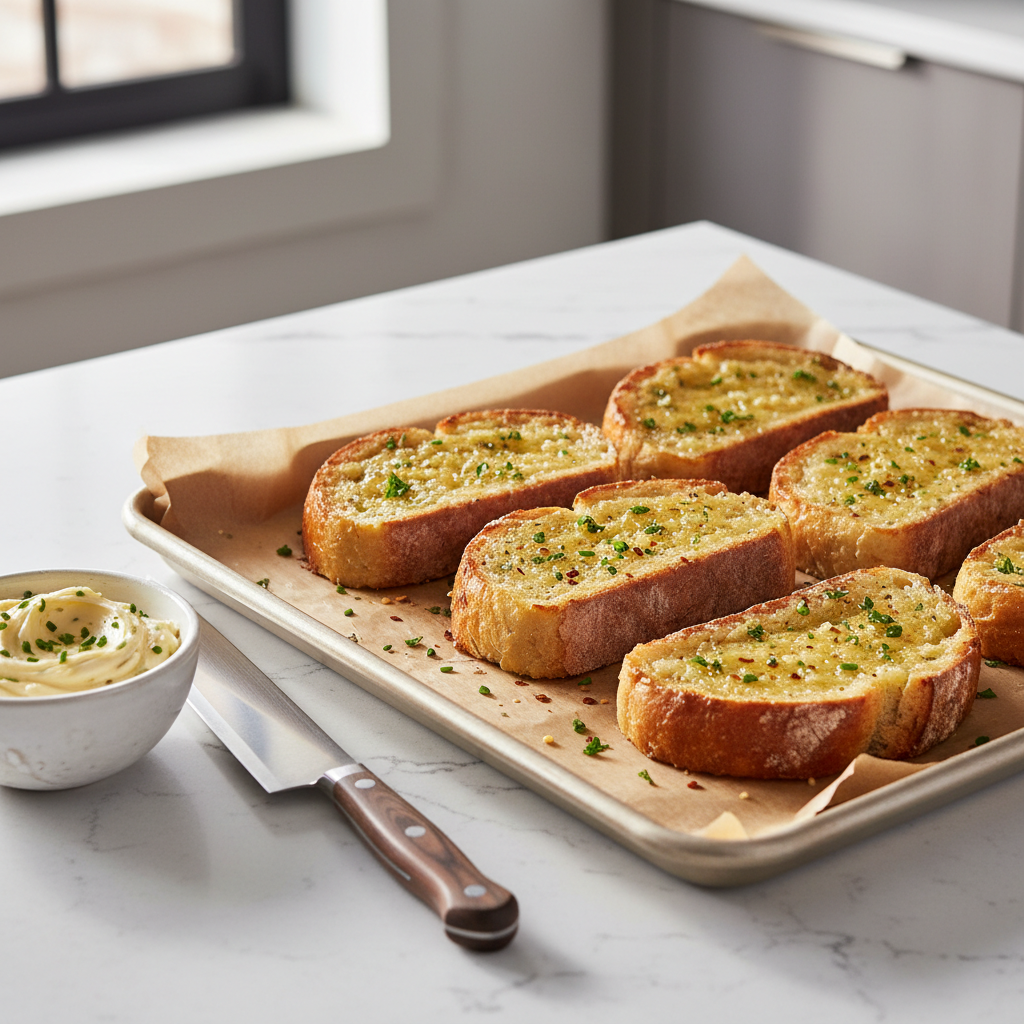
- Heat oven to 400°F. Line a sheet pan with parchment if you want easy cleanup.
- Slice bread lengthwise for a “boat” style, or into thick slices for individual pieces.
- Mix softened butter, garlic, parsley, and salt until smooth. If using Parmesan, stir it in last.
- Spread a generous, even layer on the cut sides. Aim for coverage, not puddles.
- Bake 8–12 minutes until the butter melts and edges start to crisp.
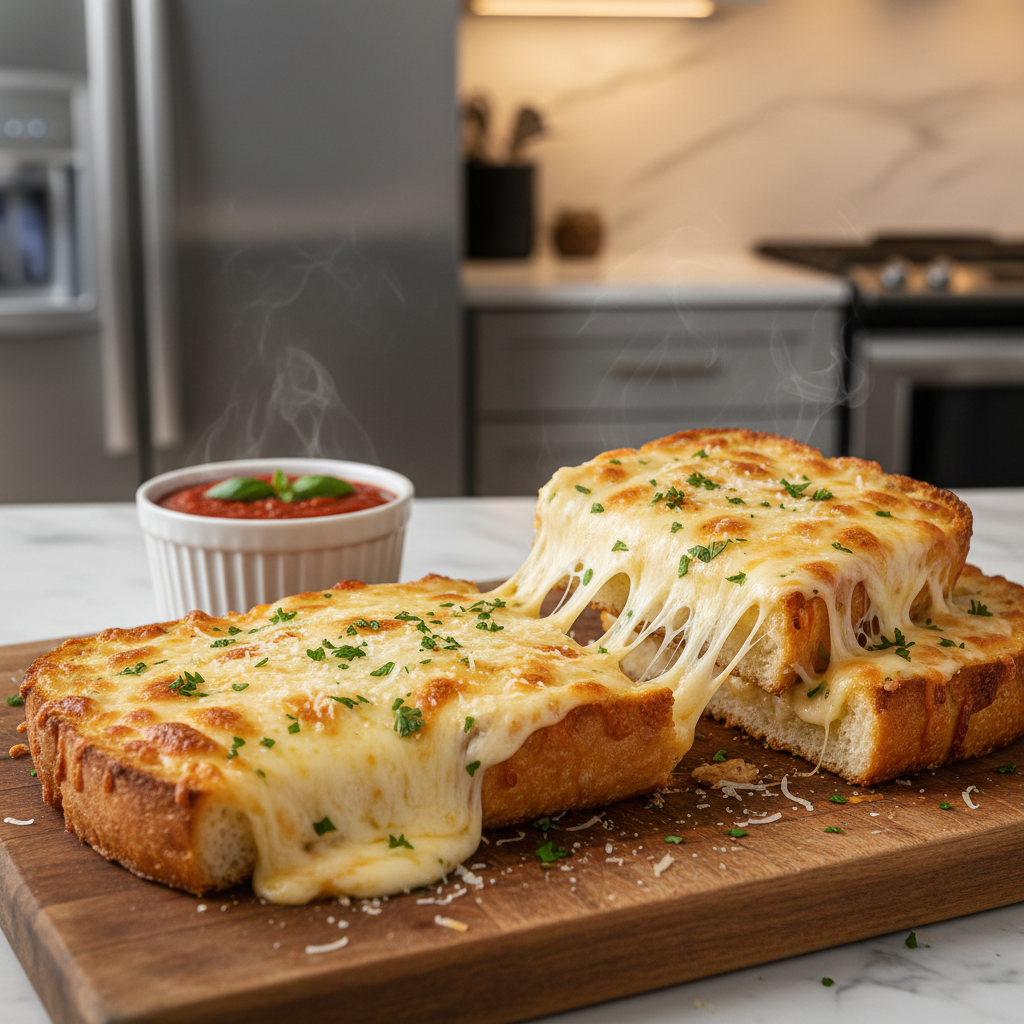
- Optional finish: broil 30–90 seconds for golden tops, stay close because it changes fast.
- Rest 1 minute, then cut and serve.
Key point: if you want the garlic flavor more mellow, sauté minced garlic in 1 tbsp butter for 1 minute, cool slightly, then mix into the remaining softened butter.
Baking times and methods (use this table)
Ovens vary, bread varies, and the thickness you cut matters. Use the table as a starting point, then trust your eyes.
| Method | Best for | Oven temp | Approx time | What to watch |
|---|---|---|---|---|
| Open-face bake | Crisp top, soft inside | 400°F | 8–12 min | Edges lightly browned, butter bubbling |
| Foil-wrapped bake | Soft, steamy garlic bread | 400°F | 10–14 min | Bread warmed through, less crisp |
| Bake then broil | Restaurant-style color | 400°F + broil | 8–10 min + 0.5–1.5 min | Top turns golden fast under broiler |
| Air fryer | Small batches | 350–370°F | 4–7 min | Check early, hot spots brown quick |
Many people chasing how to make garlic bread at home get stuck on temperature, but the bigger lever is thickness, thin slices brown faster and can taste drier even if the butter is perfect.
Flavor upgrades that actually taste different
Once you can consistently get crisp edges and a buttery center, you can play. A few upgrades are worth it, others are more noise than flavor.
- Roasted garlic butter: roast a whole garlic head until soft, mash into butter for sweet, deep flavor.
- Cheesy garlic bread: add Parmesan in the butter, then top with mozzarella during the last 2 minutes.
- Herb-forward: parsley plus a little oregano or basil reads “pizzeria” without needing much.
- Spicy: pinch of red pepper flakes in the butter, or a light dusting on top before baking.
- Bright finish: tiny lemon zest or a drop of lemon juice after baking, it lifts richness.
If you use garlic powder, choose it on purpose, it gives a rounder flavor and spreads evenly, while fresh garlic brings sharper punch but can scorch if it sits on the surface under broil.
Practical troubleshooting (fix it on your next tray)
Garlic bread fails in predictable ways, which is good news, you can correct it quickly without changing your whole recipe.
- Soggy middle: use softened butter not melted, bake open-face, and choose a sturdier loaf.
- Burnt edges, pale center: lower rack position or reduce broil time, cut thicker pieces, bake a bit longer before broiling.
- Garlic tastes bitter: sauté garlic briefly or switch part of the garlic to powder, bitter notes often come from scorched fresh garlic.
- Too salty: use unsalted butter and add salt gradually, Parmesan also adds salt so adjust.
- No flavor: add a pinch more salt, or add Parmesan, fat carries flavor but salt “turns it on.”
One more thing people rarely admit, if your butter is cold and you tear the bread while spreading, you end up with uneven patches, give the butter time to soften, then spread with a light hand.
Make-ahead, storage, and food safety
You can prep garlic bread early without sacrificing much quality, but a couple habits keep it safe and prevent freezer-burn flavor.
- Make-ahead (same day): assemble, wrap tightly, refrigerate up to 24 hours, bake when needed.
- Freeze: assemble pieces on a tray until firm, then bag and freeze, bake from frozen at 400°F, adding a few minutes.
- Leftovers: cool, wrap, refrigerate, reheat in the oven or air fryer for crispness.
According to FDA, perishable foods should not stay in the “danger zone” (roughly 40°F to 140°F) for extended periods, so for parties, put garlic bread out in small batches and refresh as needed, especially if your garlic butter includes cheese.
Conclusion: a simple plan for consistently good garlic bread
If you want a repeatable answer to how to make garlic bread at home, keep the core method steady, sturdy bread, softened butter, enough salt, bake to crisp then broil briefly for color, and you can adjust garlic intensity from there without guessing.
Action steps: try the base recipe once as written, take note of your oven timing, then pick one upgrade, like roasted garlic or mozzarella, and keep everything else the same so you can taste what changed.
If you are cooking for someone with dietary restrictions or a medical condition that affects sodium or fat intake, it may be smart to check with a qualified professional for personalized guidance.